
When used according to these instructions, the Trailparts™ Credo™ Braking system meets the requirement of: For NZ: Brake Rule 32014; trailers up to 3500kg GVM For AU: ADR 38/05, VSB1, and VIB6; trailers up to 4500kg GVM
Getting Started;
- The In-cab controller must be connected at all times and located within easy reach of the driver.
- The vehicle park or head-lights must be switched on when towing the trailer. This energizes the trailer side of the system and also will allow the trailer batteries to charge.
- Check the plug and socket of the trailer and tow vehicle are securely connected and that the trailer lighting functions all work correctly. A faulty or intermittent lighting connection could mean the brakes do not operate correctly.
- Ensure the break away cable is securely fastened to the vehicle.
- Test the emergency brake is working. First adjust the gain control setting to read 75%. Depress emergency stop button fully, and begin to pull forwards while still holding the button down. The trailer brakes should lock the wheels.
- Do not use the emergency stop feature or breakaway function as a parking brake.
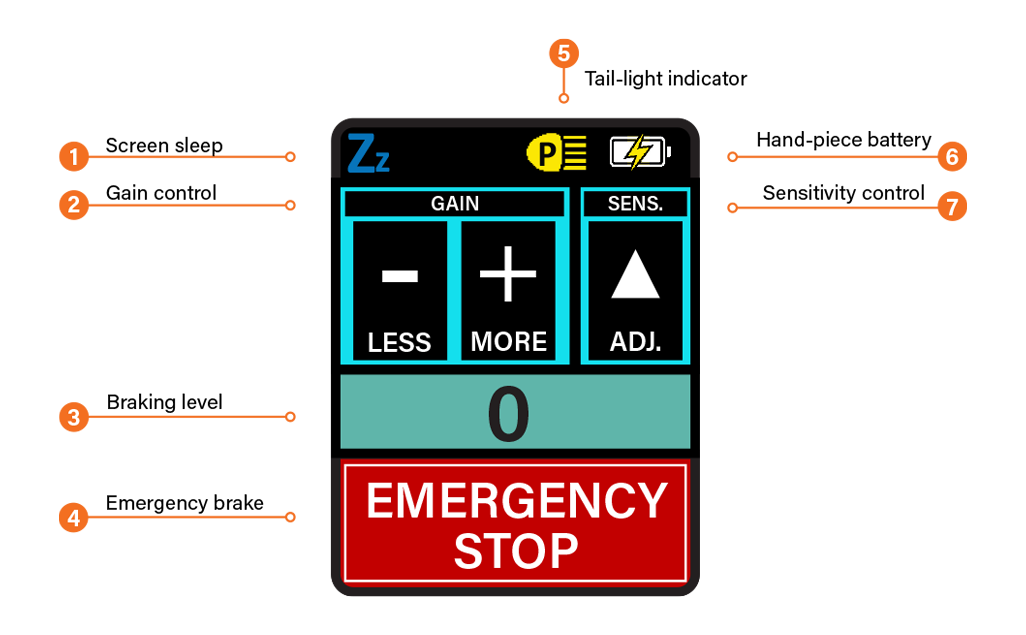
Credo cab controls
➊ Screen Sleep Button
Press and hold for 5 seconds. Unit will beep 6 times and display sleep menu. When put to sleep while plugged into power, tap screen to wake. If put to sleep while unplugged, unit will need to be plugged into power again to wake up.
➋ Gain Control - Adjusting Gain Control:
Press either button once to show current gain setting.
The plus button will increase the maximum brake percentage, and the minus button will decrease it. This should be set so the vehicle will brake to a halt without the trailer wheels locking up. An effective benchmark is to perform a brisk stop on a straight flat stretch of road from 30 kph. The vehicle trailer combination should halt without the trailer wheels locking. Increase or decrease the gain setting until the trailer is braking at just under the lock up level. Ensure conditions are safe around you before carrying out this procedure.
➌ Braking Level
This number displays braking level during braking and gain and sensitivity settings.
➍ Emergency Brake
When activated, this will apply the trailer brakes at 75% of the current gain setting. This can be used to control trailer sway situations and stop the vehicle combination in an emergency.
➎ Tail-light Indicator
Confirms tail-lights are on. Shows red X if tail-lights not detected.
➏ Hand-piece Battery
Status of hand-piece batteries.
➐ Sensitivity Control
Press once to show current setting.
Controls determine how quickly and aggressively the brakes will activate, with 1 being least and 5 the most aggressive. Pressing this advances the setting from 1 up to 5 and then back to 1. Setting this to 3 provides mid-range braking. Decrease setting to 2 or 1 if brakes come on too suddenly. Increase setting if braking action seems too slow.
Credo screen controls and warnings
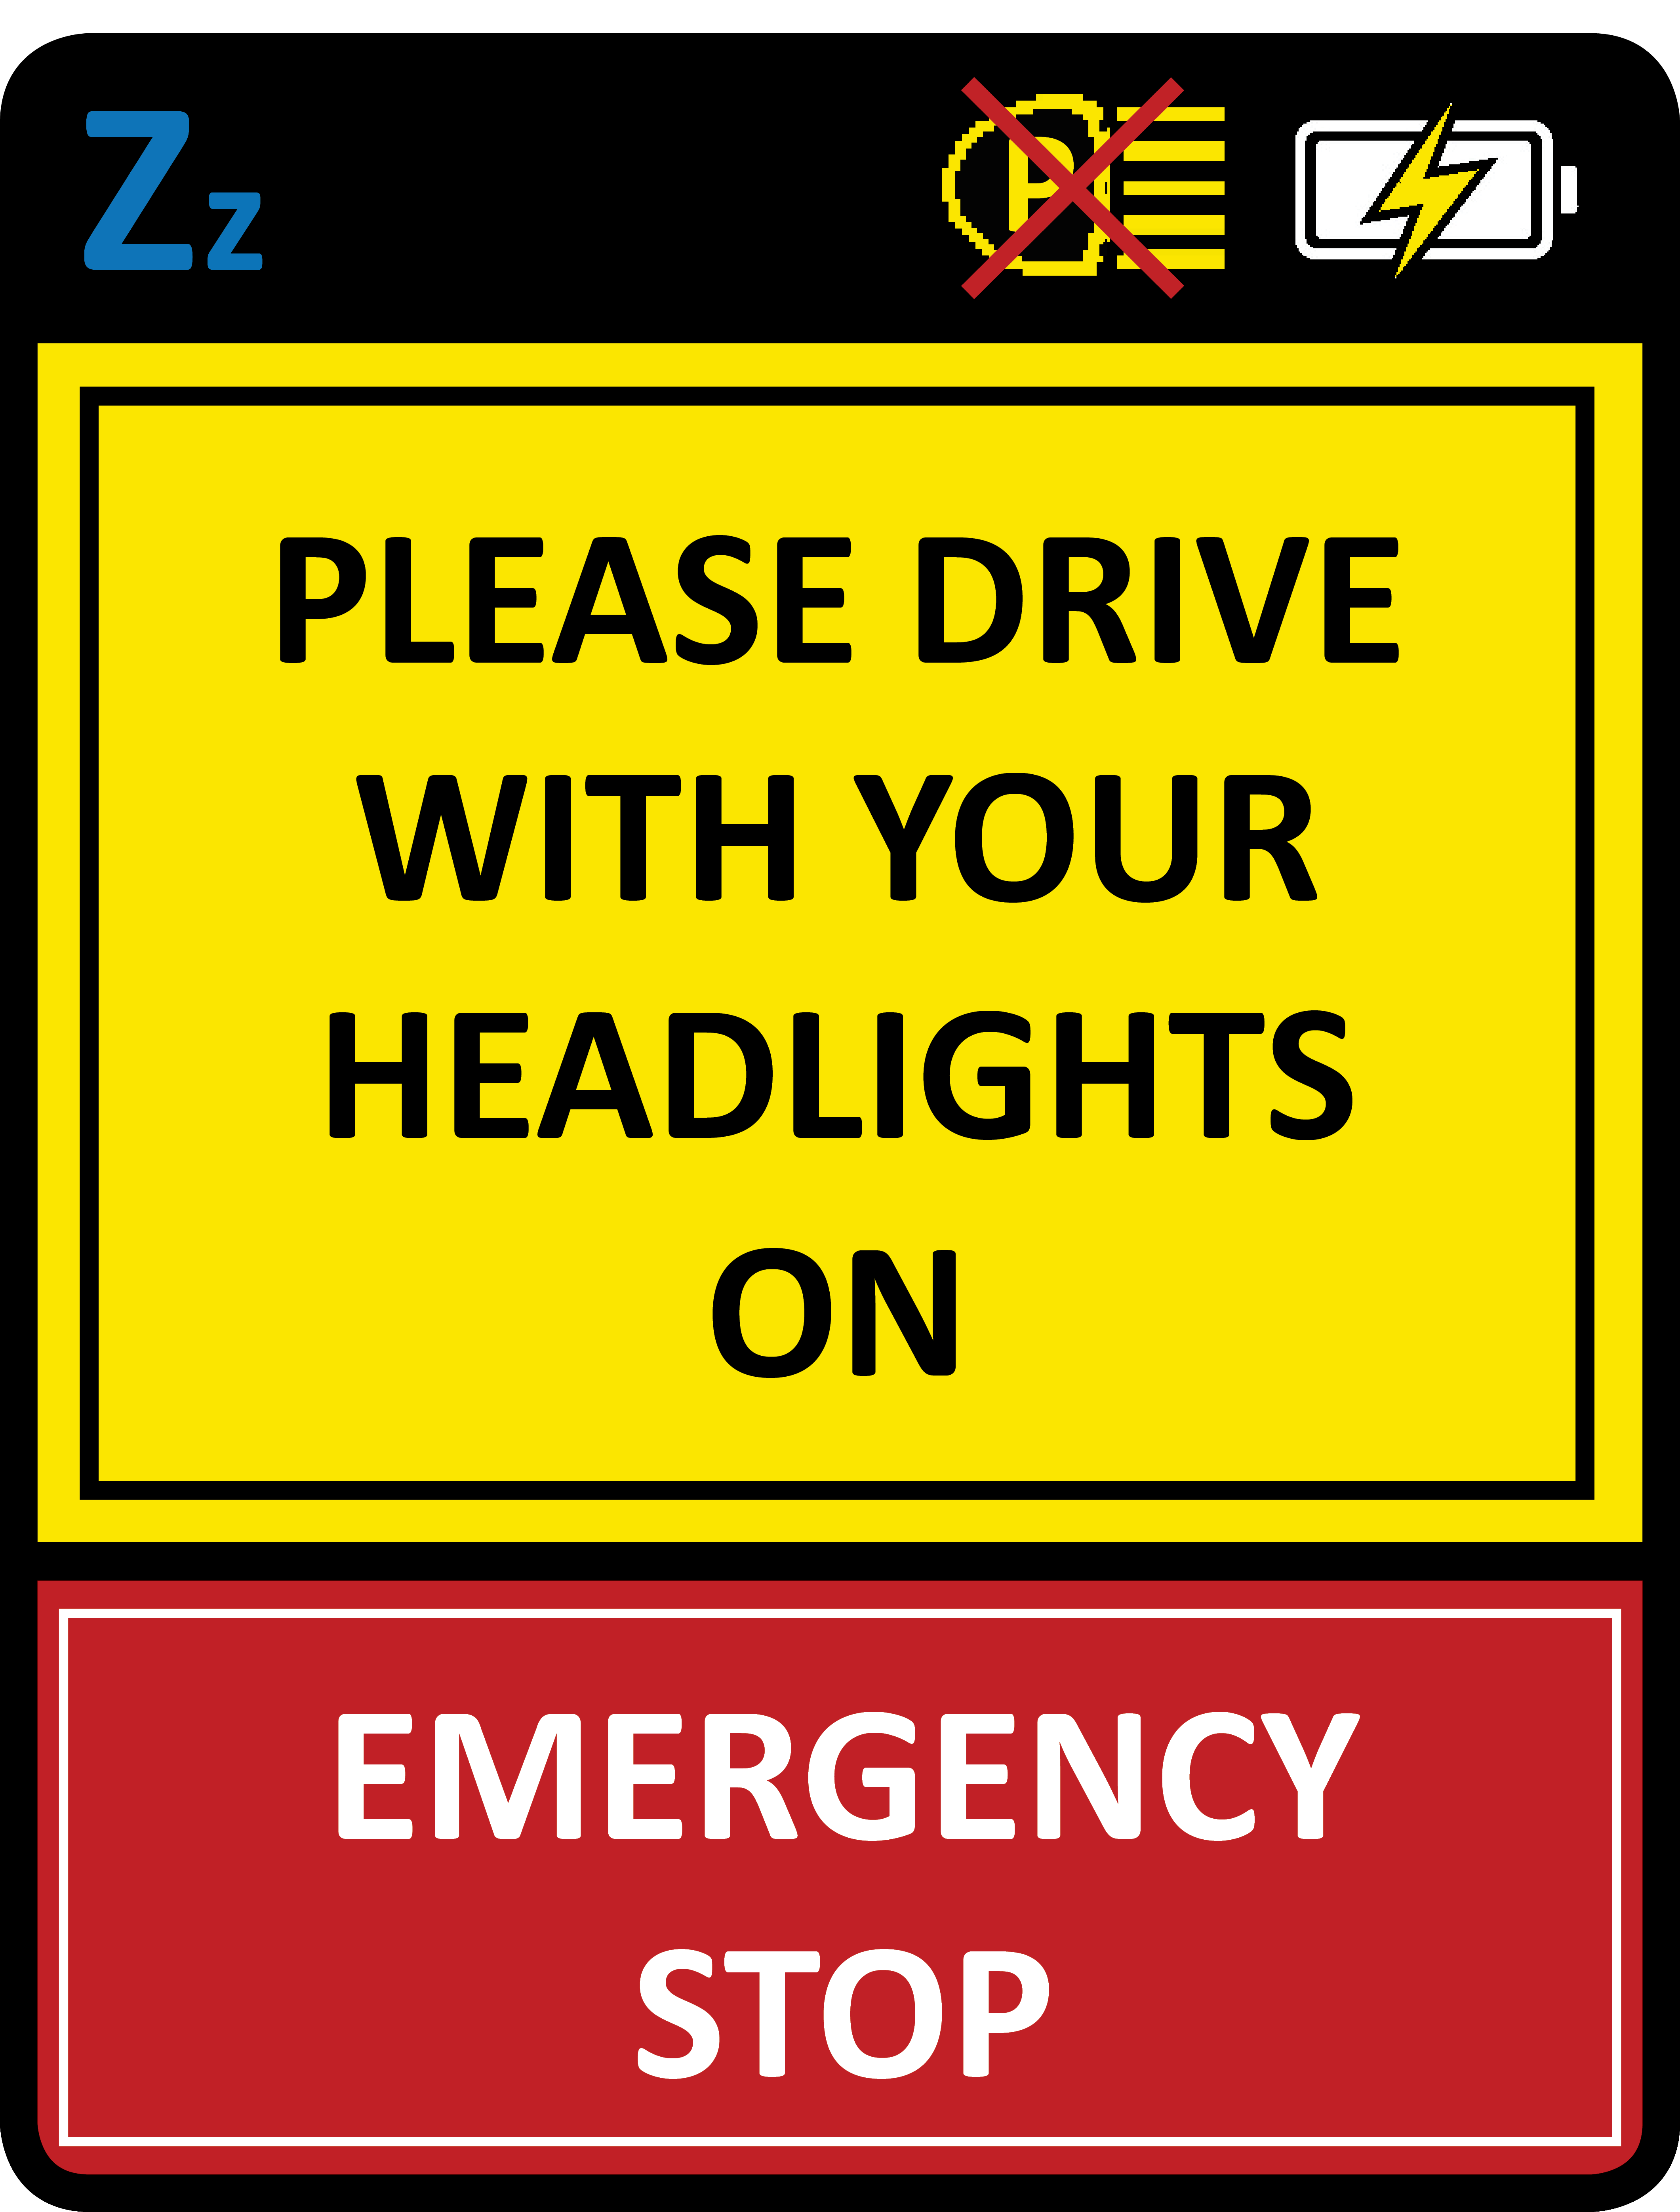
Headlights warning or EC on older controllers
Will flash on screen with 4 beeps if headlights are not on the trailer or there is a loss of communication between the trailer and cab modules. In the event of communication loss, providing the headlamps are on and the lighting connection between the tow vehicle and the trailer is not faulty the brakes will continue to operate at the last setting. This should however be investigated as soon as it is safe to stop.
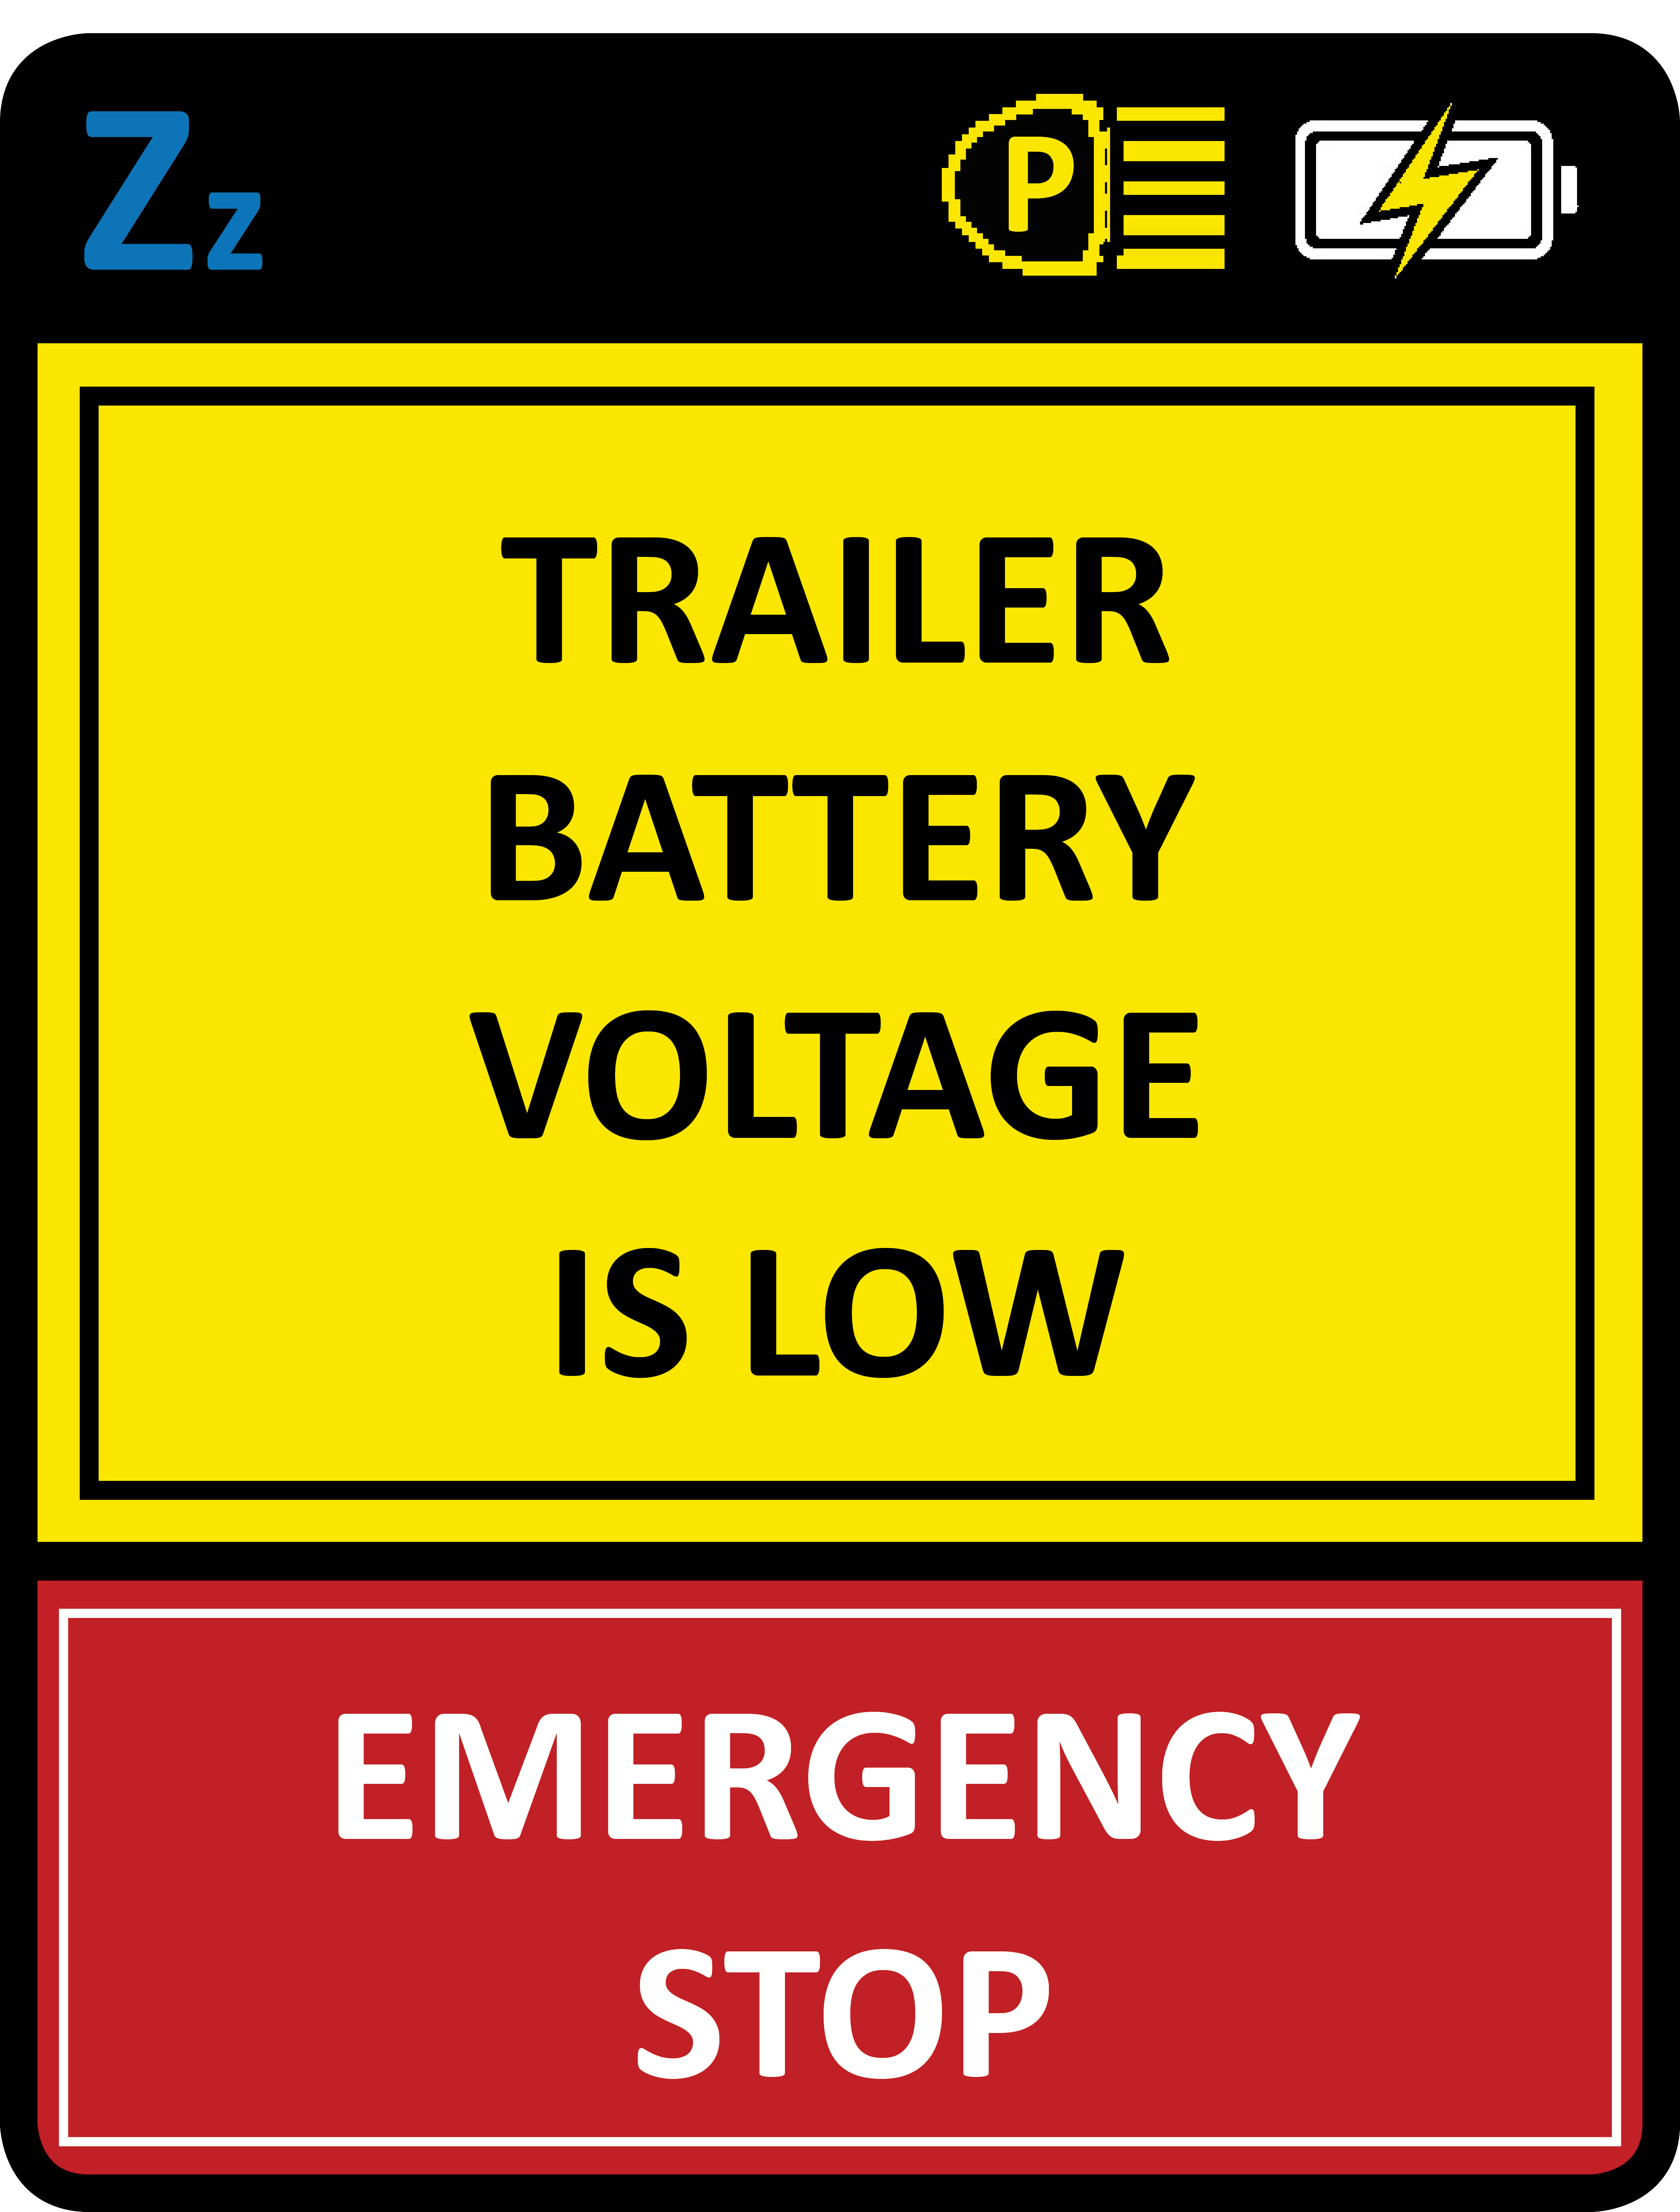
Low trailer battery warning or EB on older controllers
Will flash and beep 4 times each time the brakes or emergency brake are applied if the trailer battery voltage has dropped to an unsafe level, which would result in the brakes not operating correctly. This screen will also display if the trailer battery is disconnected.

Sleep menu
Press and hold ‘Zz’ in the top left corner of the screen for 5 seconds. Credo unit will beep 6 times and display sleep menu shown to the left. Press the indicated area of the screen to put the unit into sleep mode or press cancel to return to the home screen.
When put to sleep while plugged into power, tap screen to wake. If put to sleep while unplugged, unit will need to be plugged into power again to wake up.
Note: Trailer module is compatible with 12 or 24 volt. Cab unit is compatible with standard vehicle USB ports or 12 or 24 power sockets providing a 12-24 volt USB adapter is used.
Serial Number Locations

Incab Controller:
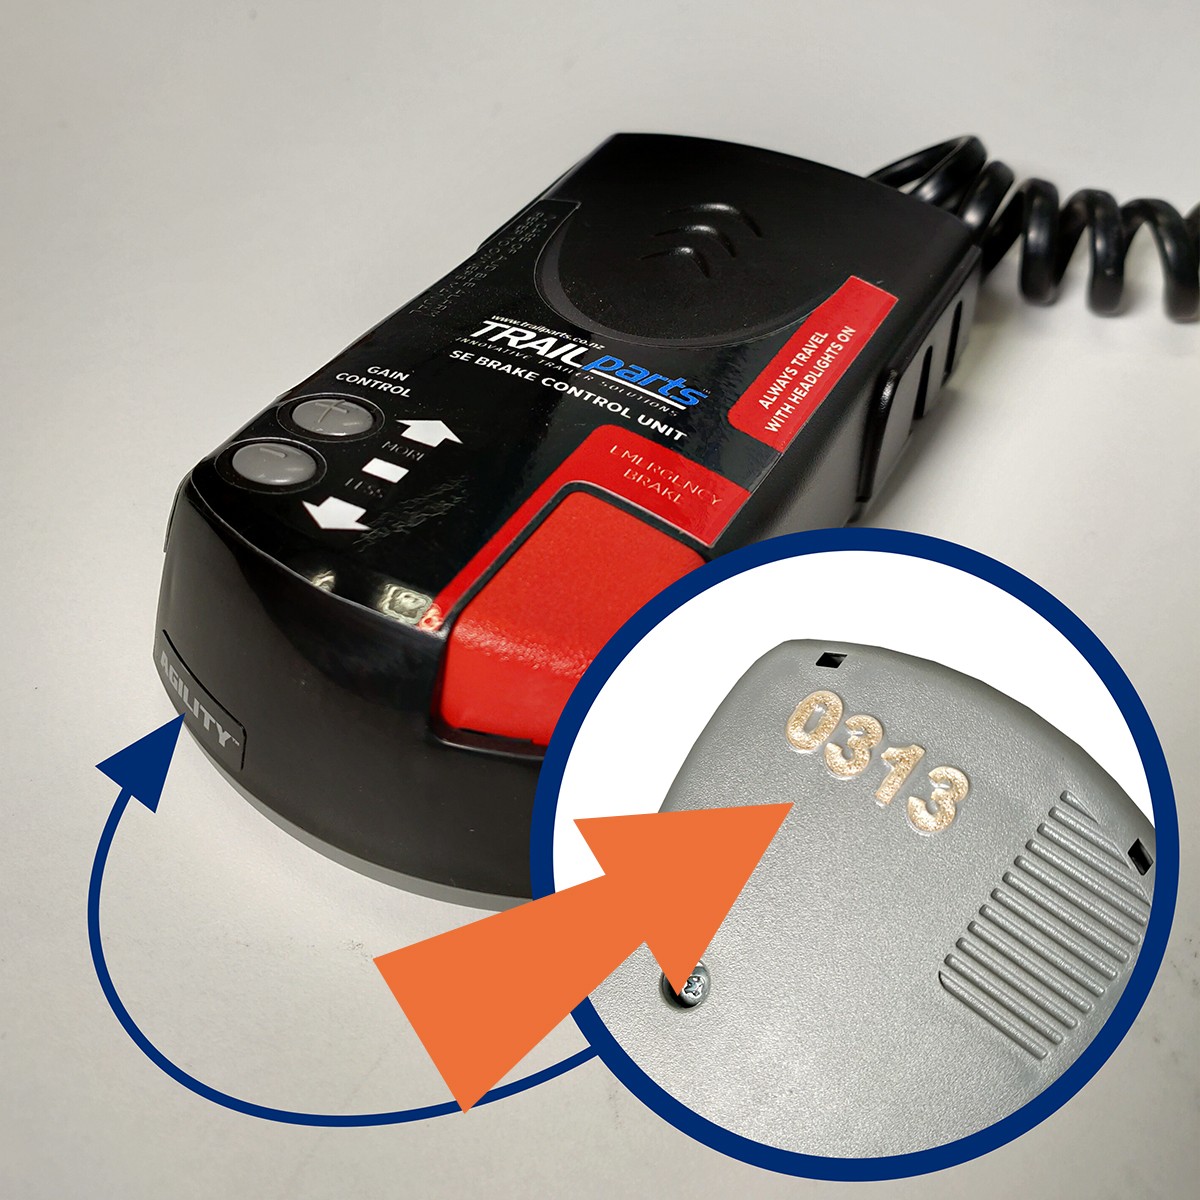
For serial numbers 1-2700 the serial number is located on the grey base of the controller or at the bottom of the black plate on the back if it is a touch screen controller.
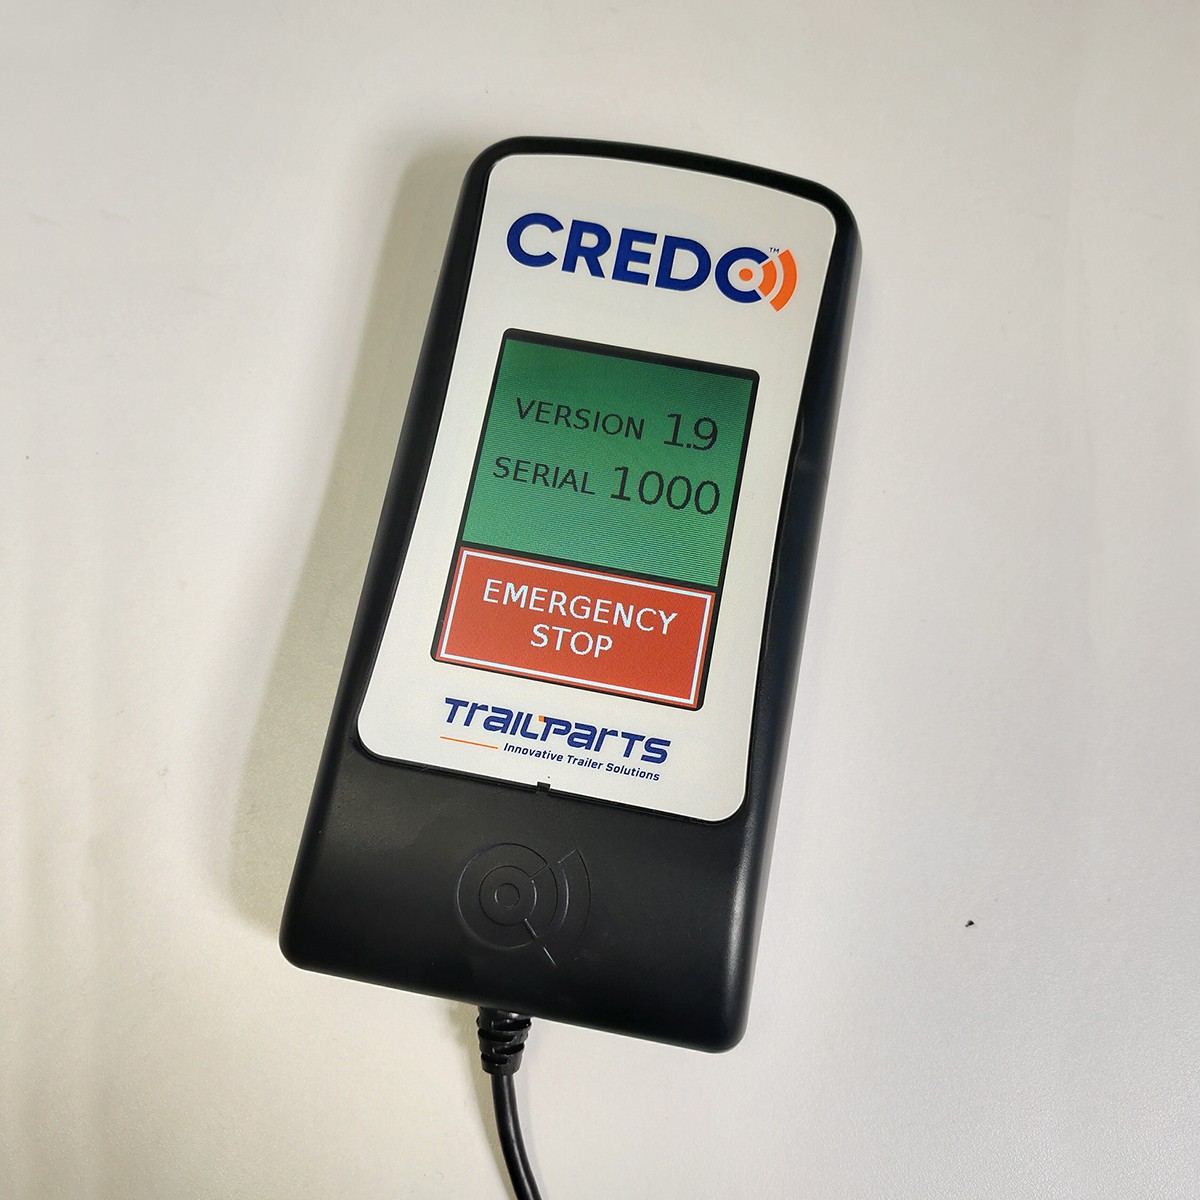
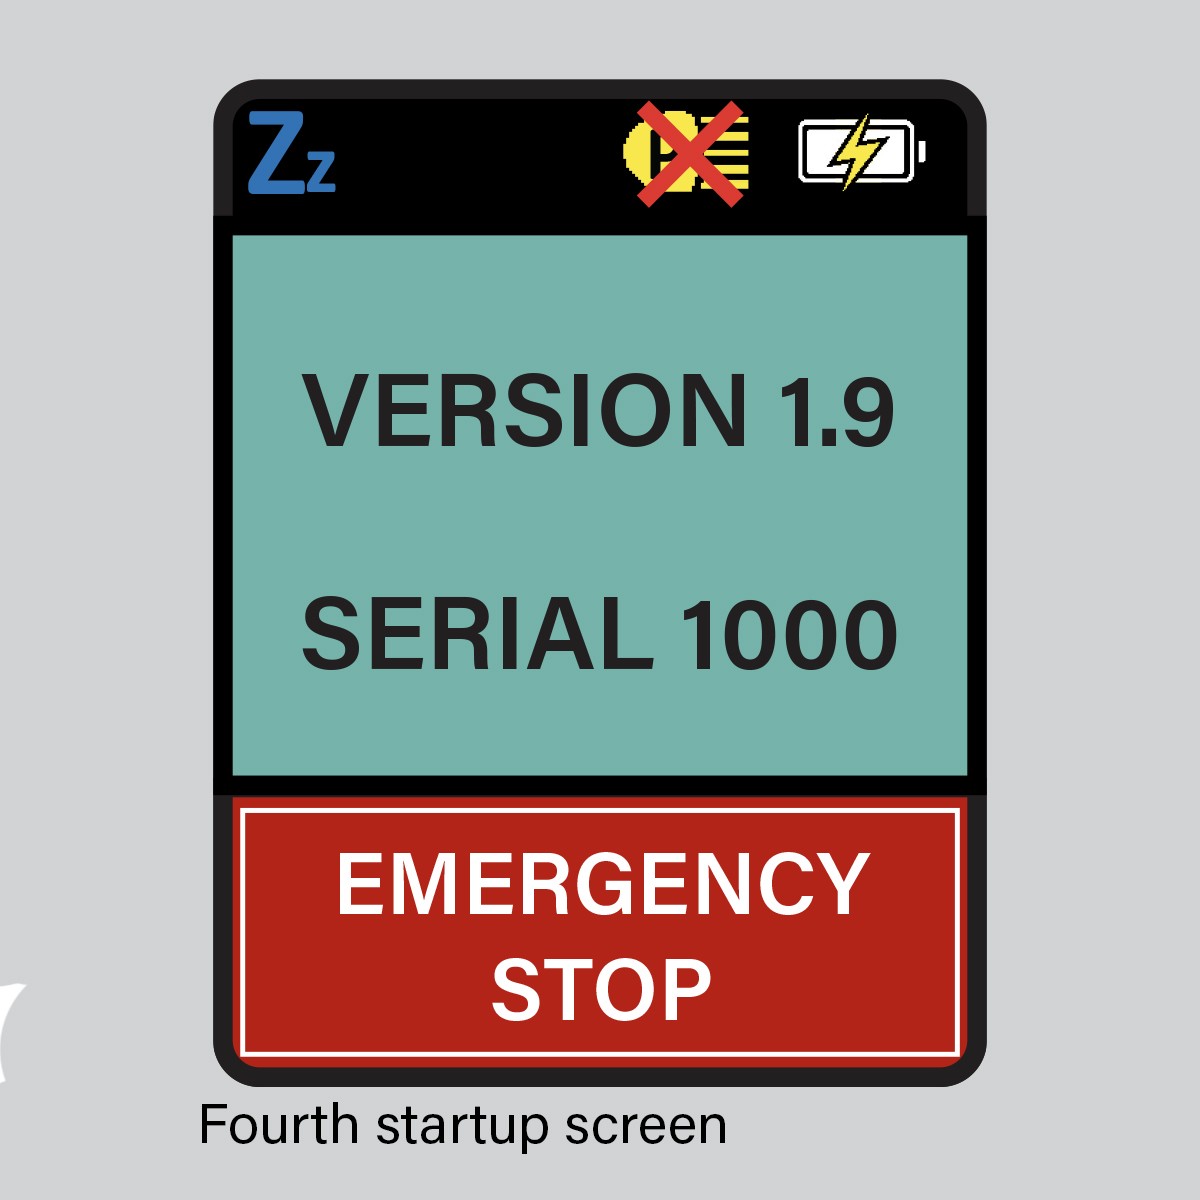
Serial numbers 2701- when the touch screen controller is first connected to power the serial number is shown on the 4th screen that displays on start up.
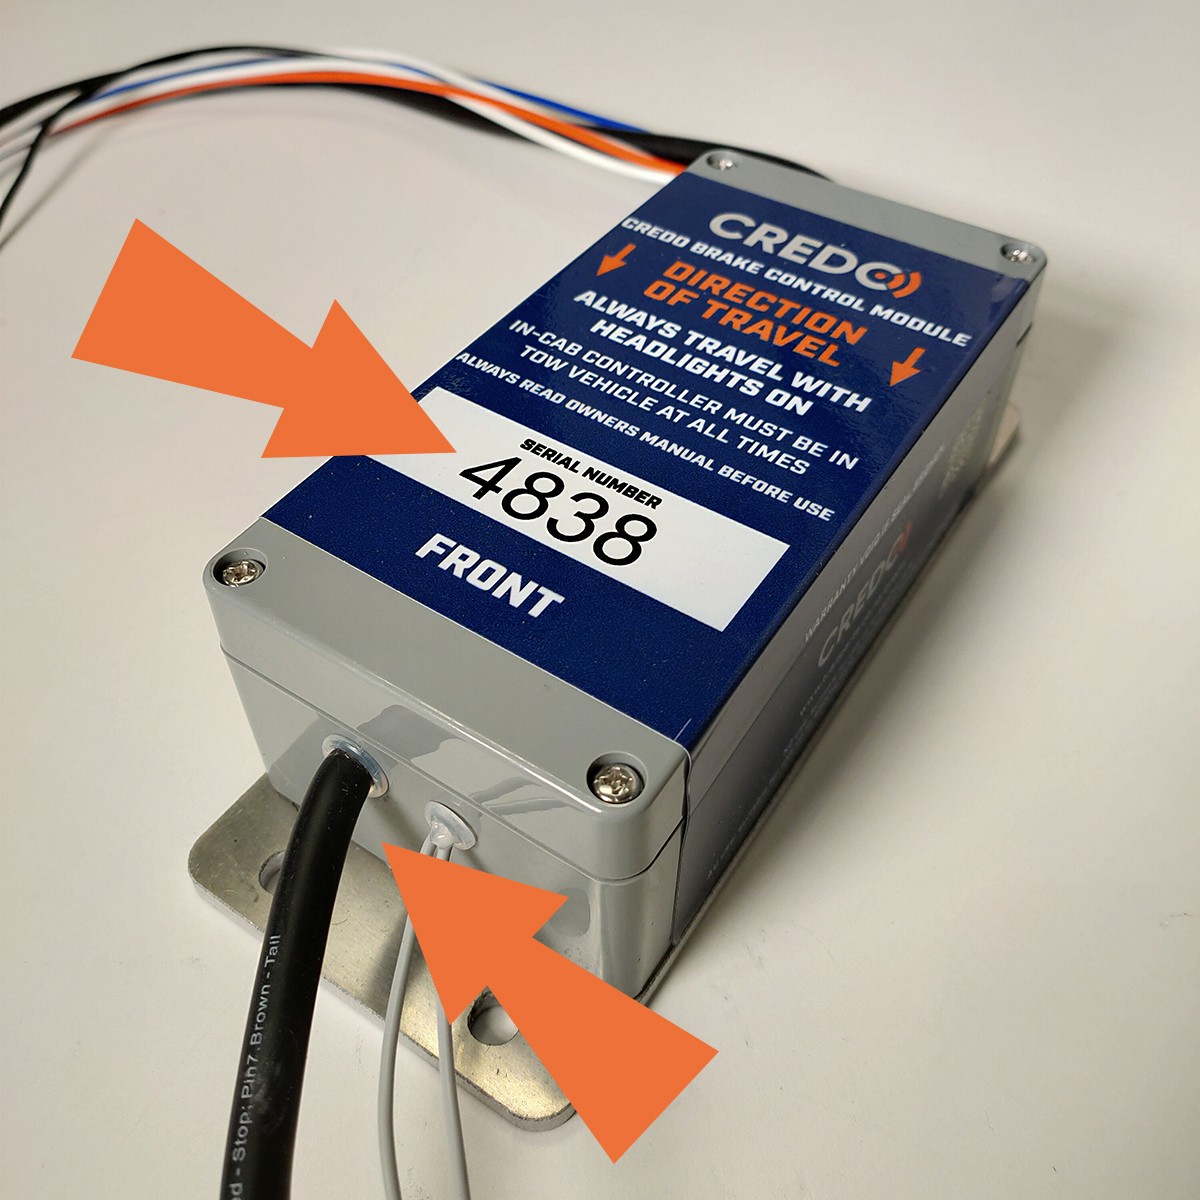
Trailer Mount Controller:
Either engraved/stamped into the alloy base plate or etched into the front face of the trailer mount controller.
Recoding of Touch-Screen In-cab Controller
| ➊ | Power up In-cab controller on the USB cable and leave plugged in for the duration of coding the controller. |
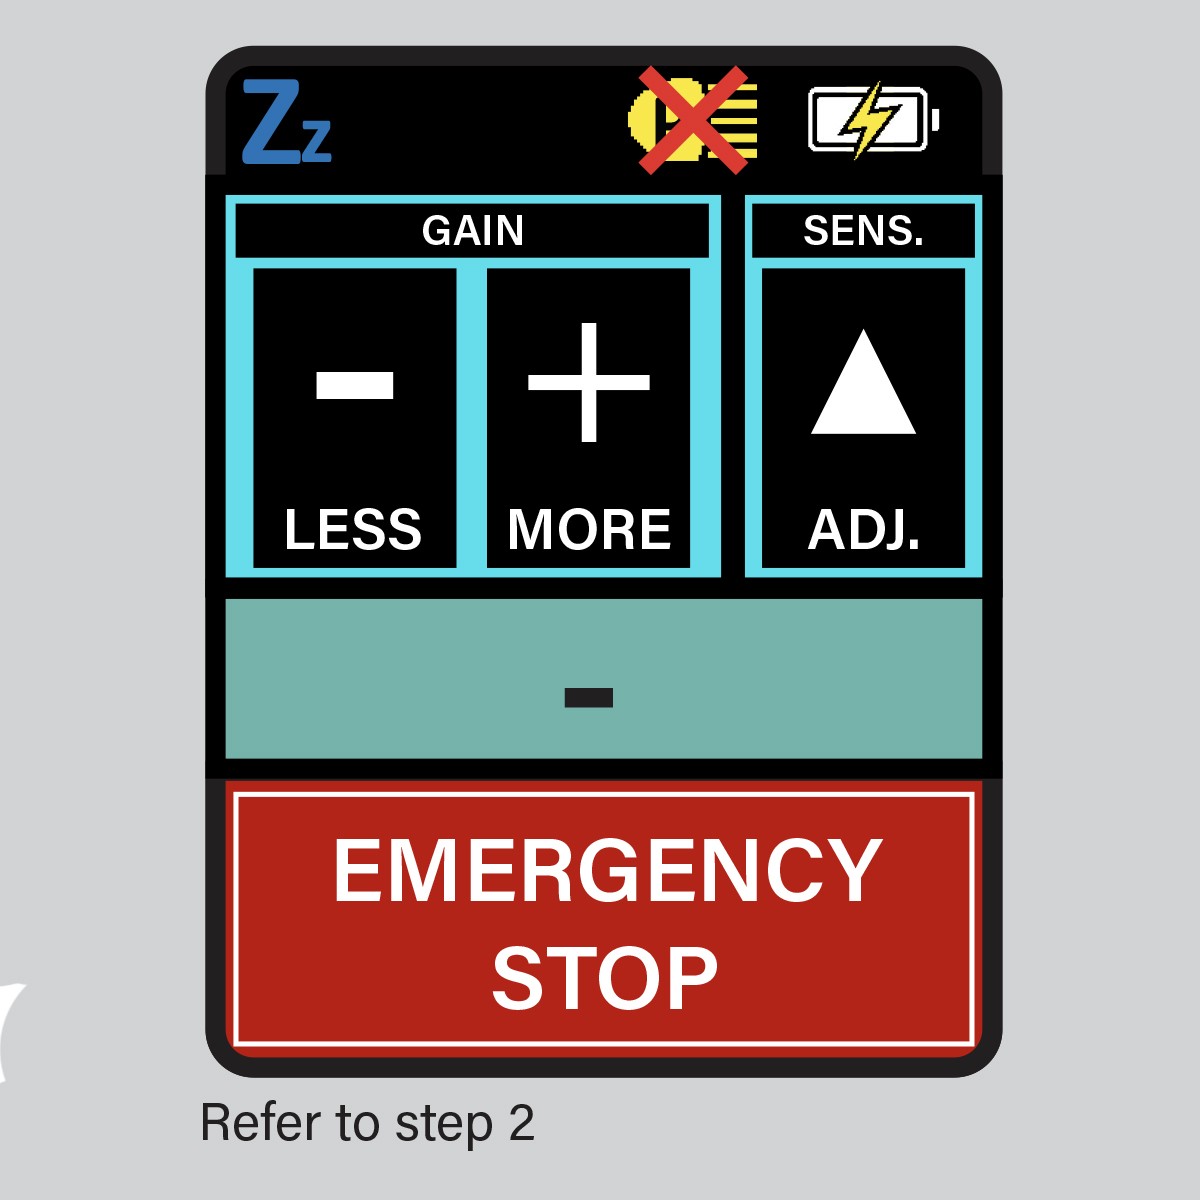
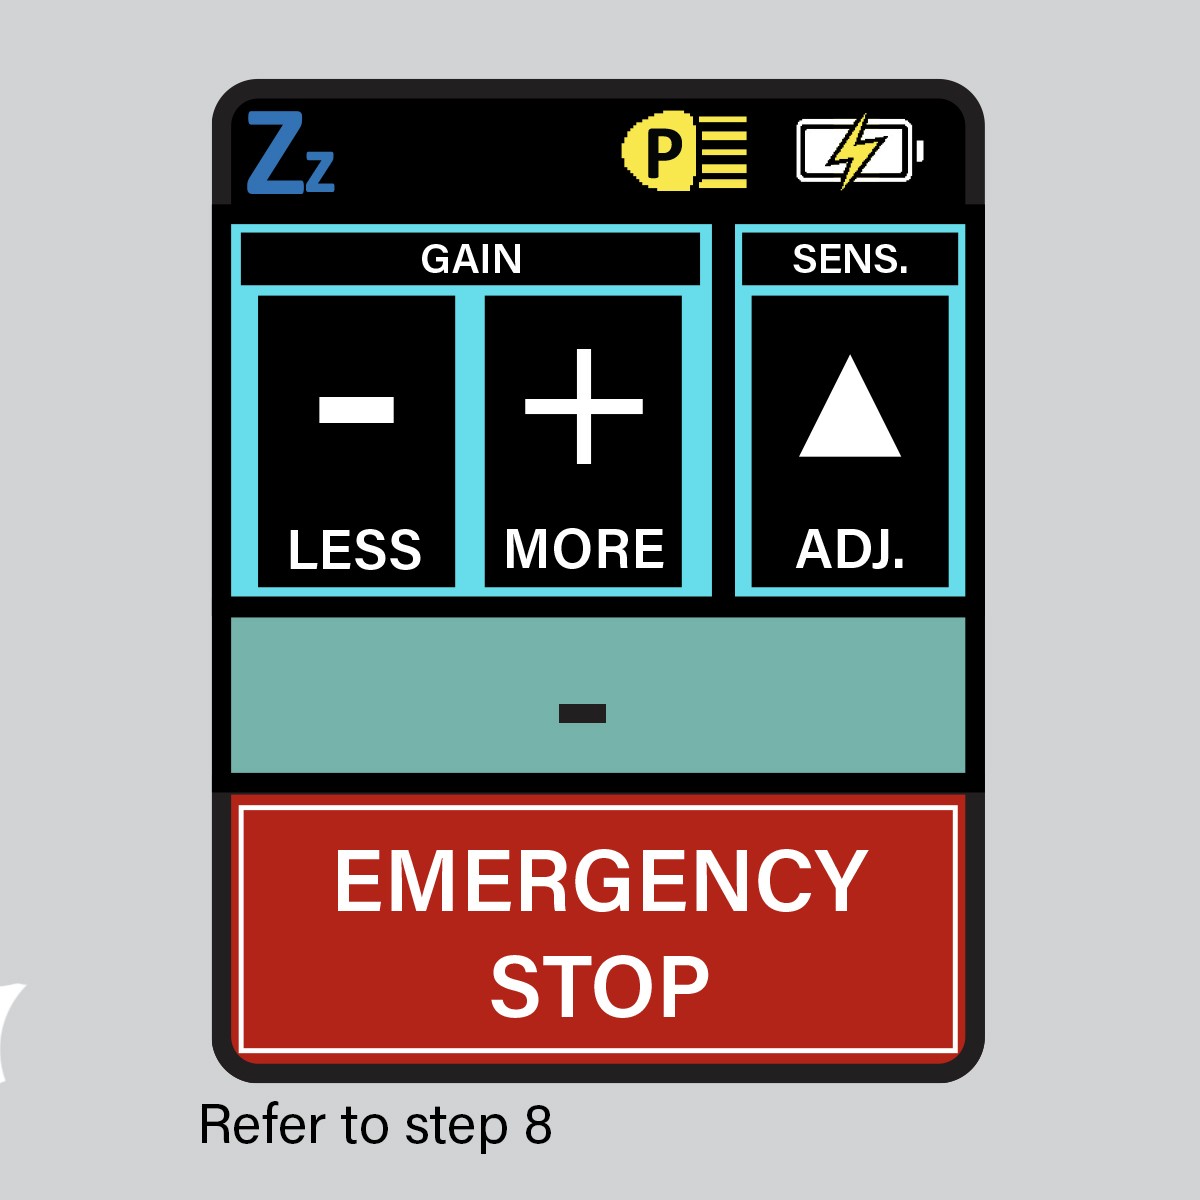
| ➋ | Wait till the screen displays the gain and sensitivity control buttons. |
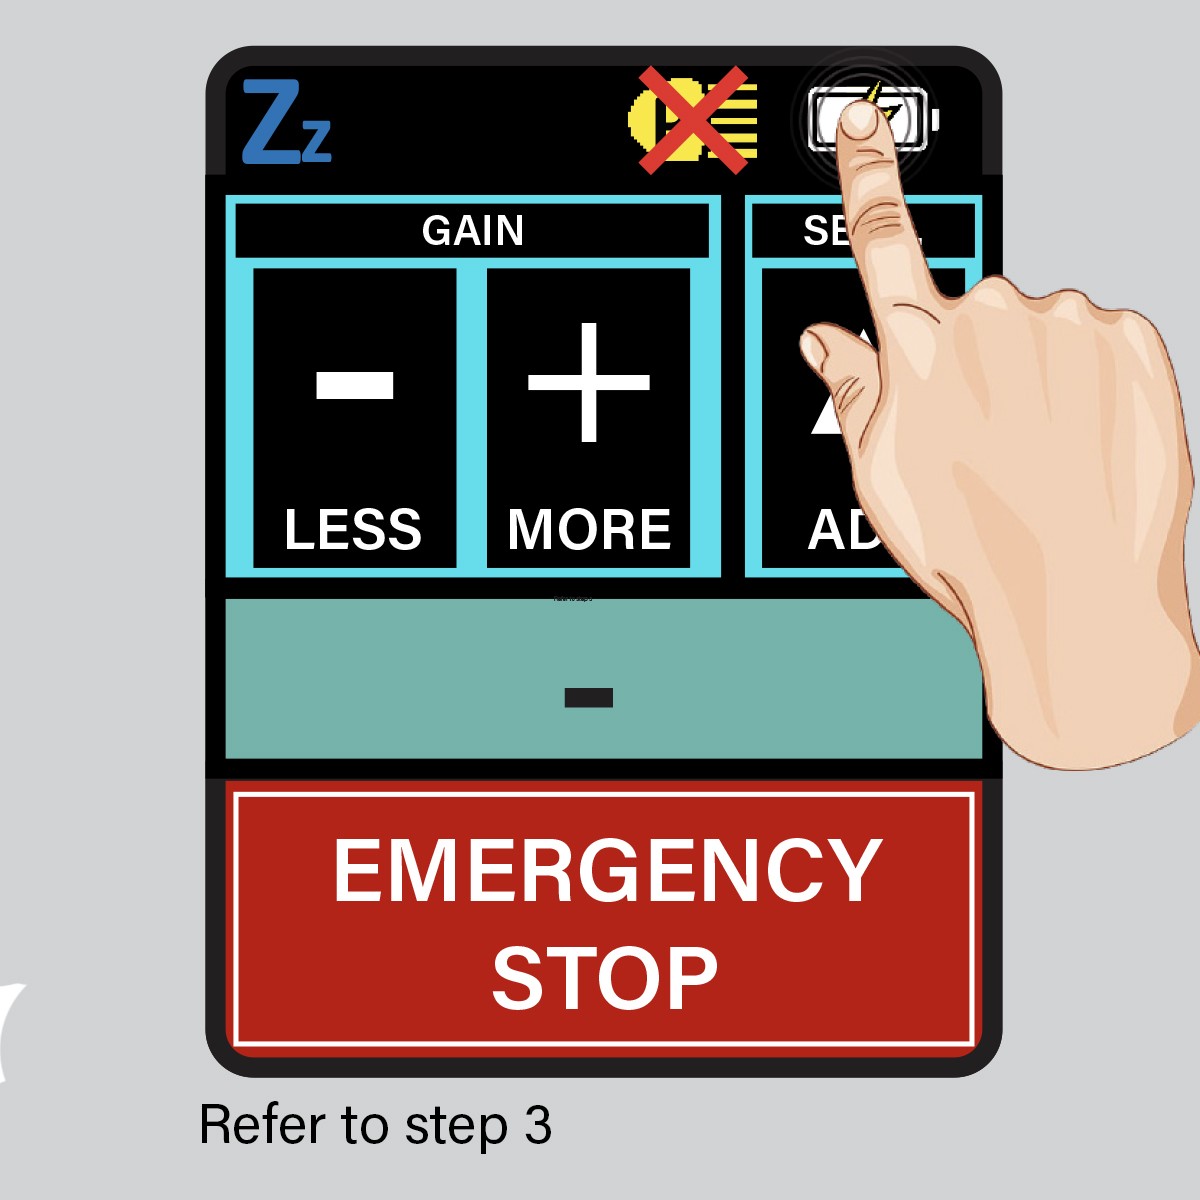
| ➌ | Press and hold the battery symbol for 5 seconds ignoring the screen flashing any messages. |
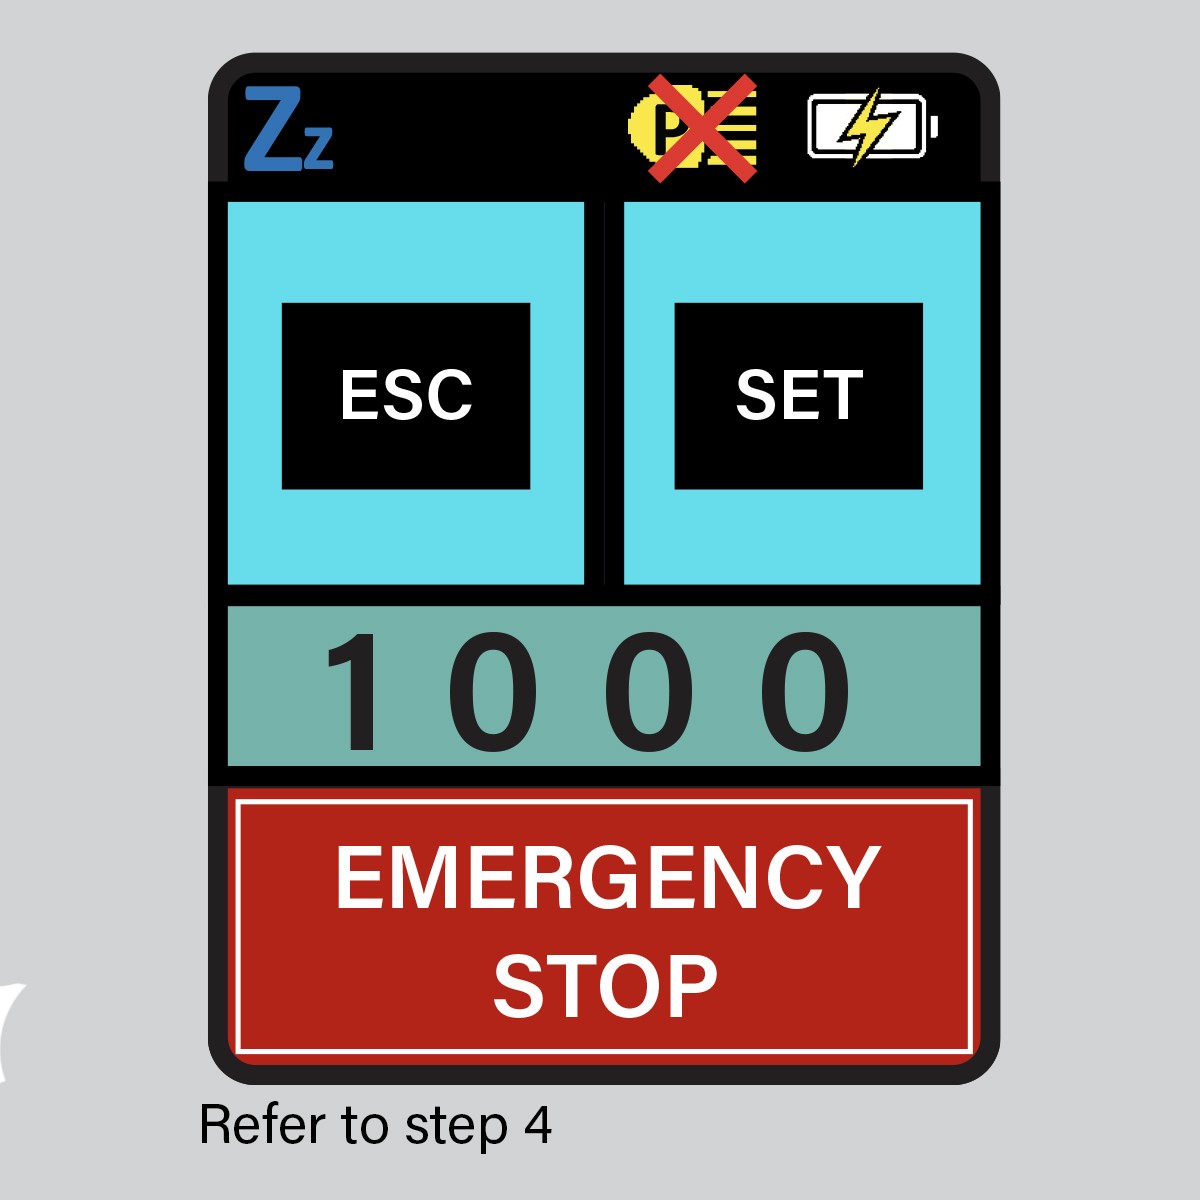
| ➍ | The In-cab controller will do a single beep and display 2 buttons ‘SET’ and ‘ESC’, and a 4 digit number. This number is the number serial number of the matching trailer mounted controller. |
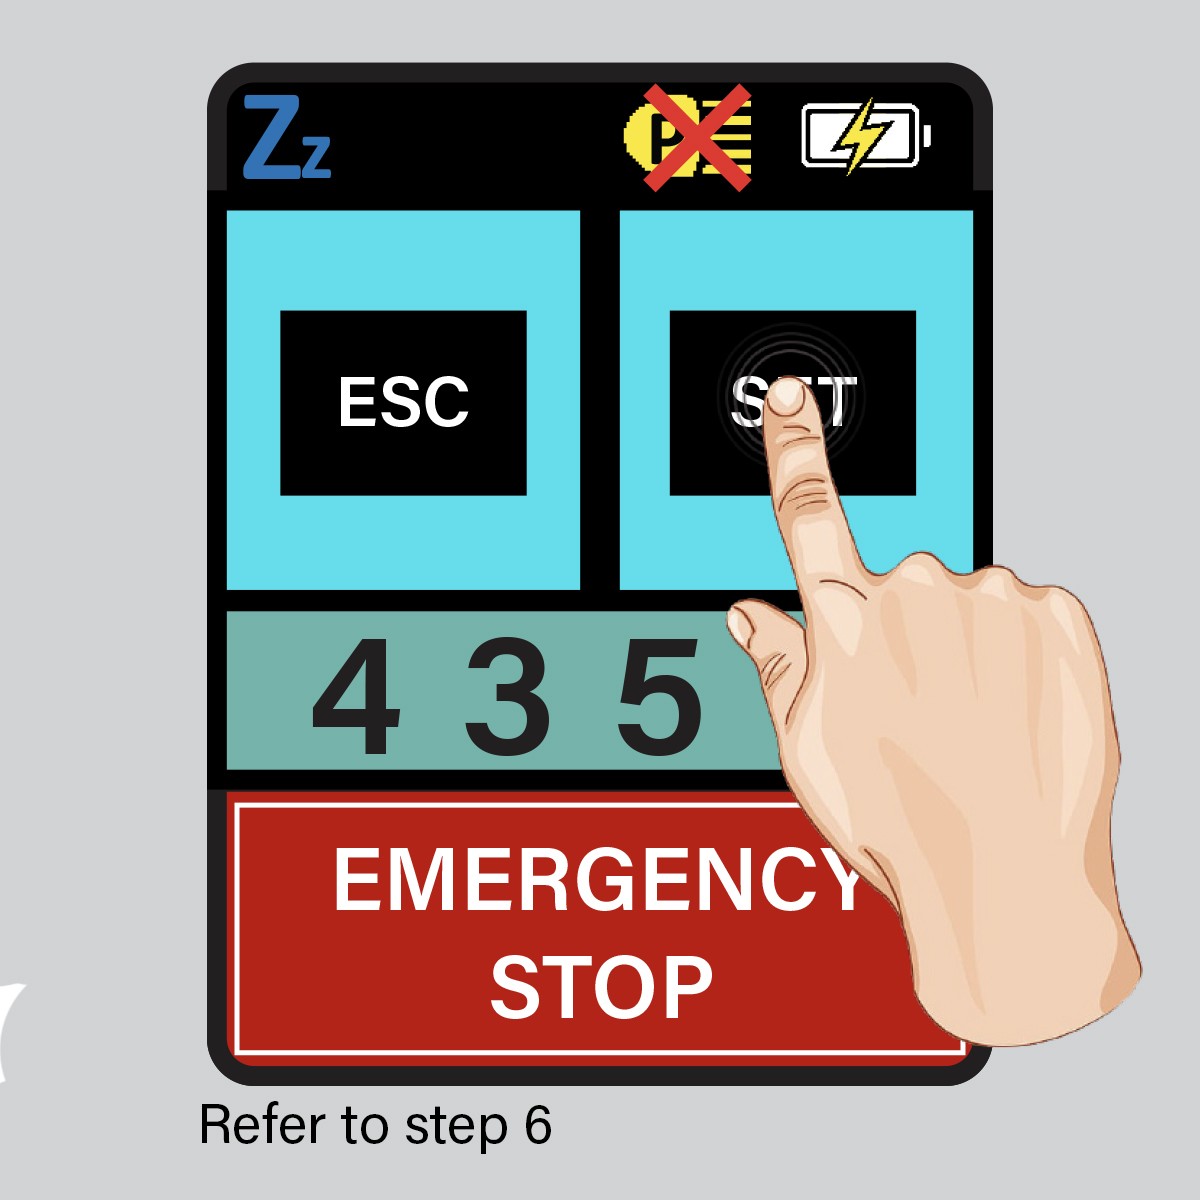
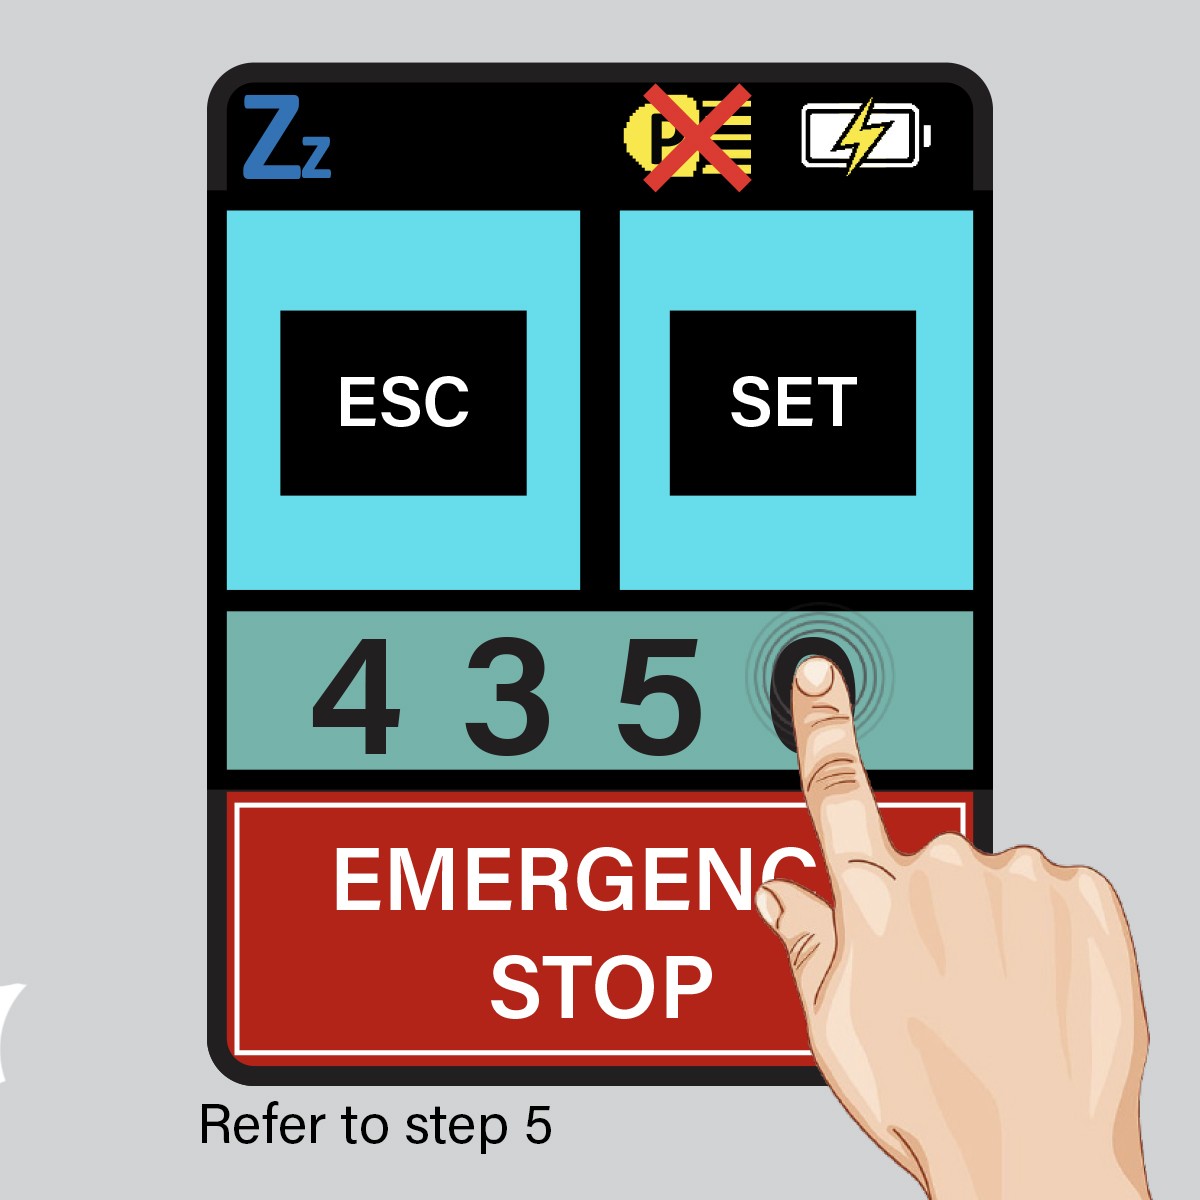
| ➎ | Change the number by tapping each digit to increment the digit by one. To reach 0 increment the digit till it reaches 9 and then the next tap brings it back to 0. (Tip: tap lower on the numbers to avoid bumping ESC or SET). |
| ➏ | Once you have the serial number of your trailer mounted controller showing press ‘SET’ to lock the In-cab controller to that serial number. |
| ➐ | The In-cab controller will after a pause emit 3 beeps and return to the normal operation screen. |
| ➑ | Connect the trailer to vehicle and turn on the headlights – check the head light symbol loses the red cross to prove it is connected to the trailer and functioning as normal. |
| ➒ | If red cross doesn't go away, unplug In-cab controller and select immediate sleep if this screen appears. Leave unplugged for approx 5 seconds. Plug in the In-cab controller and if the serial number on the fourth start up screen does not match the number on the trailer, start recoding process again. |
Maintenance and checks
Check battery is keeping well charged. A well charged battery should be at or above 13 volts. This is particularly important if the trailer is left parked for extended periods of time. If the trailer is not used for extended periods the battery should be removed every 2 months and charged to ensure it does not become damaged. This can happen if the battery charge drops below 10.5 volts.
Check the trailer plug and vehicle socket to ensure they are not damaged and they give a sound electrical connection. An intermittent or faulty connection could mean the brakes do not function correctly.
If fitted with a hydraulic actuator make sure the fluid level remains sufficient. The fluid should be changed in line with general trailer service intervals.
If fitted with electric drums make sure they are kept properly adjusted and that the magnets and linings are not excessively worn and are replaced in line with general trailer service intervals.
Troubleshooting
Fault |
Possible Causes |
Repairs/Checks |
|---|---|---|
| In-cab controller shows
‘Low Trailer Battery’ warning (old style In-cab Controller shows Eb Error) Or No tail lights / tail lights go out when brakes are applied. |
|
|
| In-cab controller shows
‘Please Drive with Your Headlights On’ message, even though the headlights are on. (old style In-cab shows Ec Error). |
|
|
| Brakes randomly come on and lock up. |
|
|
| Braking output on In-cab controller stays at ‘-‘ on the screen when brakes are applied. |
|
|
| In-cab Controller shows ‘0’ or higher numbers when brakes applied but no braking happens. |
|
|
Warranty Terms and Conditions
LIMITED 18 MONTH WARRANTY CONDITIONS
Trailequip Ltd warrants that the mechanical and electrical components of the TRAILPARTS/CREDO products as listed below will be free of defects in material and workmanship for a period of eighteen months from the original date of purchase.
Whilst we take every effort to ensure compatibility with all known vehicles we cannot guarantee 100% compatibility for all vehicles.
To obtain any warranty service, you must provide Trailequip Ltd with proof of purchase, such as a copy of your tax invoice or purchase receipt, which will include a purchase date and the serial number of your product. This warranty does not cover the removal or re-fitting of the product.
TRAILPARTS/CREDO will, at its discretion, repair, replace or refund the purchase price of a defective product or component, provided you return the defective product or component during the warranty period, freight charges prepaid, to Trailequip Ltd or to an authorized TRAILPARTS/CREDO dealer or stockist. Attach your name, address, email address, telephone number, a description of the problem, and a copy of the tax invoice or purchase receipt listing the date of purchase and the TRAILPARTS/CREDO serial number of the defective product.
This warranty does not apply if the product has been damaged by misuse, overloading, impact, modification, improper installation. This warranty is void if any TRAILPARTS/ CREDO serial number has been removed, altered, or defaced.
Please contact the below for warranty service or support:
TRAILPARTS/CREDO
C/ Trailequip Ltd
2 Tuna Street
Dargaville 0310
New Zealand
New Zealand Phone: 0800 487 245
International Phone: +649 439 5508
Australia Phone: 1300 538 598